
CelSector Characters: Enemies, Bosses and the Survivor
CelSector's cast explained: the 16-layer survivor, the 35+ enemy types split by family, the four boss encounters and how each one fights back.
Quick answer: CelSector has one playable character and no party roster. The "cast" is your customizable survivor plus more than 35 enemy types and four boss encounters. The survivor is built from 16 independent clothing layers, 40 colours and 12 outfit presets; the enemies split into mutants and zombies, insects, parasites and the hazards they leave behind. Bosses are the queen wasp, the C1 jellyfish, the two-head final boss and the optional giant worm.
This page is the roster: who exists, what each group does to you, and which answer the game expects. For fight patterns in order, the boss guide→ is the companion page.
The game ships no bestiary and no enemy health numbers. Names below are the ones the route and the community use; the developer has not published official enemy names (official statement: 35+ enemy types, no list).
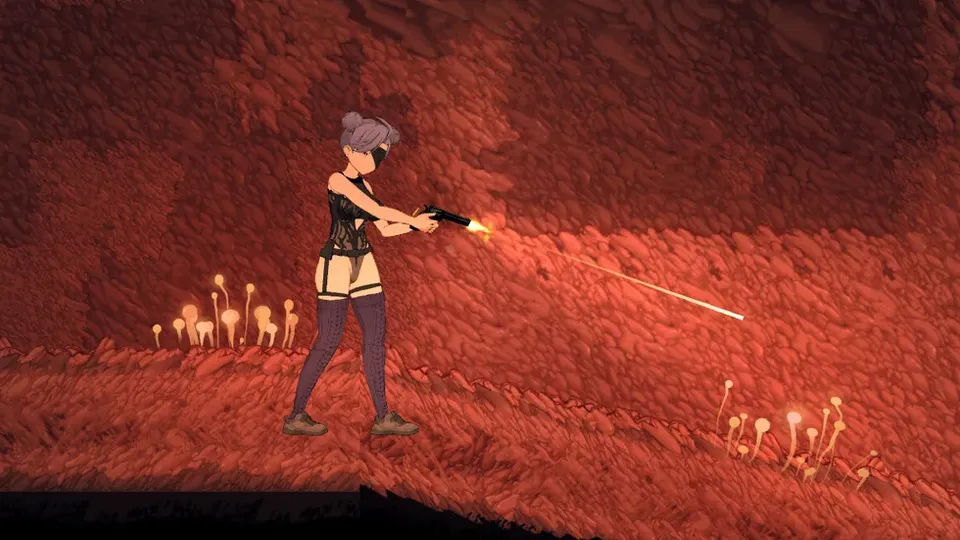
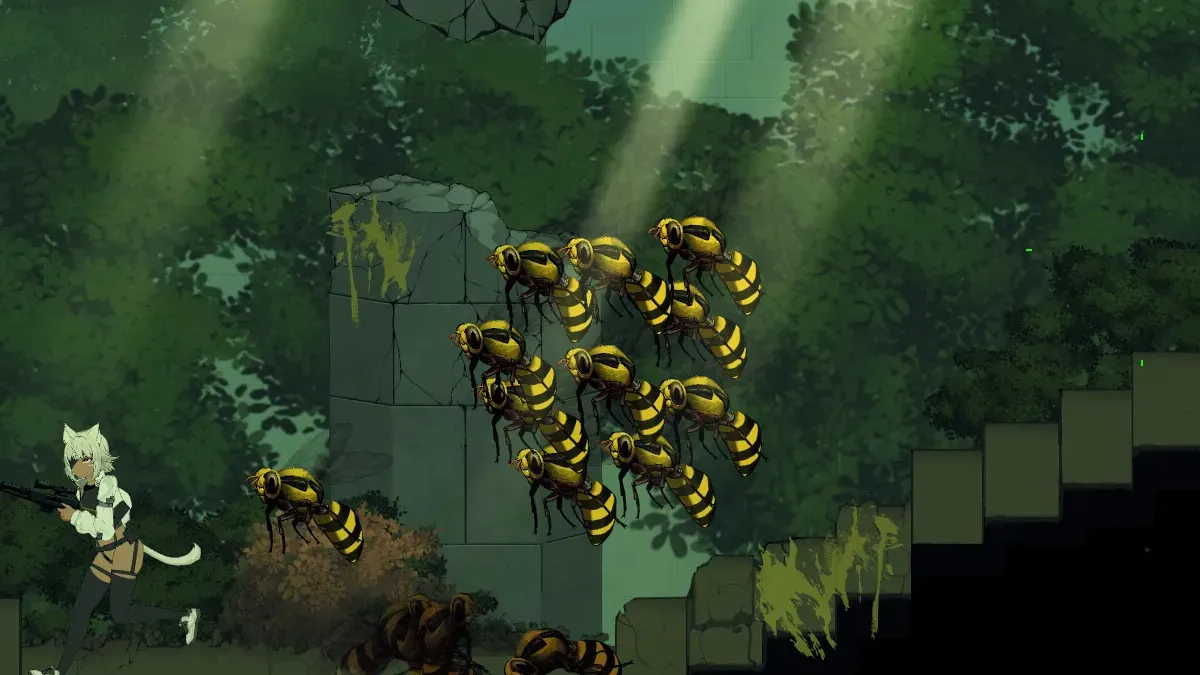
Who is in CelSector?
| Role | How many | Source |
|---|---|---|
| Playable survivor | 1 | Official Steam page |
| Enemy types | 35+ | Official Steam and itch.io pages |
| Boss encounters | 4 | Route data across all six sectors |
| Named NPCs or companions | None documented | Not shown on the store page or in the demo |
Two things follow from that table. First, "characters" in a CelSector search usually means enemies, because that is where the variety sits. Second, any page claiming a large cast of named heroes is guessing; the game is a solo survival run through one facility.
The survivor: what you actually control
Your character is the only thing the game lets you design, and the design system is unusually deep for a side-scroller. The official feature list gives these numbers:
| System | Number | What it changes |
|---|---|---|
| Independent clothing layers | 16 | Hair, eyes, tattoos, tops, bottoms, innerwear, suits, accessories and more |
| Colour options | 40 | Palette per garment, plus texture variations |
| Outfit presets | 12 | Swap a full look instantly mid-run |
| Clothing destruction stages | 3 | Tears and rips that change how the model reads and how grabs resolve |
The layer count matters more than it sounds. Because every layer is drawn separately, a chest that unlocks "a top" does not overwrite your hair or your socks; it adds one layer. That is why the clothing collection runs to dozens of pieces while the look still stays recognisable in cutscenes and animations.
Two practical consequences:
- Length toggles are a layer property. The official page uses ankle socks versus thigh-highs as its example. You are editing the same item, not hunting a second drop.
- Damage is per outfit, not per slot. After a fight your look is at stage 1, 2 or 3, and stage 3 is visibly shredded. The fix is a preset, not a repair item.
The survivor has no levelling, no skill tree and no stat screen. Progression is capacity pickups plus better guns, covered on the upgrades and capacity page→.
The four bosses
| Boss | Sector | Optional | Signature attack | Answer |
|---|---|---|---|---|
| Giant worm | Hidden side arena | Yes | Area attacks from below, long recovery | Shotgun on the recovery window; unlocks Just a Worm |
| Queen wasp | B2, hive | No | Wasp nests plus a dive that drops her low | Break nests first, shotgun the landing, sniper the head |
| Jellyfish boss | C1, laboratory | No | Floats high and sends flying adds in rows | Laser pistol for rows, shotgun for the close phase |
| Two-head final boss | C2 | No | Two health bars, alternating heads, add lanes | Laser pistol on lanes, sniper and shotgun on heads |
Difficulty is not a hidden fifth boss: Hard mode keeps the same four patterns and shortens the windows. If a fight feels unfair, the usual cause is an add row you did not clear, not a missing mechanic.
Enemy families and the answer each one wants
The official description groups the 35+ types into infected mutants, large insects and extraterrestrial parasites, with zombies named on the demo page. The table below maps those families to the encounters the six sectors actually use.
| Family | Examples you meet | First sector | What it does | Wrong answer | Right answer |
|---|---|---|---|---|---|
| Infected mutants | Humanoid melee mutants | A1 | Closes distance and grabs | Standing still to trade shots | Pistol at range, shotgun if it reaches you |
| Zombies | Corridor waves | A2 | Slow, numerous, blocks the lane | Sniper ammo on singles | Rifle or SMG, keep backing up |
| Swarm larvae | Pit larvae, maggots | A1 | Overwhelms in tight spaces | Reloading in the open | Pistol or SMG, clear before dropping |
| Animal packs | Dogs | A2 | Fast, arrives in threes | Fighting in the open room | Doorway choke, shotgun |
| Large insects | Fast ants, earthworms | B1 | Rush groups, floor ambush | Ignoring disturbed ground | Watch the floor, back up, SMG |
| Web builders | Spiders | B2 | Silk slows you into a grab | Walking through silk to reach loot | Kill the spider, break silk from range |
| Nest spawners | Wasps and nests | B2 | Endless flyers until the nest dies | Shooting flyers one by one | Destroy the nest, then the flyers |
| Parasites | Infection carriers | B2 onward | Applies a mutation debuff | Tanking the hit to save a dodge | Break line of sight, kill at range |
| Slime and jellyfish | Mucus pools, flying jellyfish | C1 | Slows movement, rows of adds | Sprinting through the pool | Clear from the edge, laser pistol on rows |
| Tentacles | Corridor growths | C1-C2 | Controls a narrow lane | Pushing through the middle | Clear one direction, keep distance |
Two rules cover most of this table. Kill the source, not the spawn: nests, pods and egg sacs keep producing until they are destroyed. And never reload in the open while a grabber is alive; the reload animation is longer than the grab wind-up.
When a new enemy appears, watch one attack cycle before committing ammo. If it spawned from a structure, the structure is the target. If it flies, fight it from a doorway. If the floor moves, back up.
Hazards are characters too
Four status families do most of the work of killing players, and all four are named on the store page:
| Status | Source | Effect | Counter |
|---|---|---|---|
| Parasitic infection | Certain enemies | Physical mutations and debuffs | Kill the carrier before it closes; avoid the grab |
| Slowing mucus | Slimes and pools | Movement speed drops | Clear from the pool edge, do not sprint through |
| Restrictive silk | Spiders and web rooms | Movement restricted, grab setup | Break the web with the shotgun first |
| Sensory toxins | Lab hazards | Alters your senses mid-fight | Reset the room state, fight from a known corner |
The full timing and interaction rules are on the status effects page→. Clothing interacts with all four: at destruction stage 3, escaping a grab takes noticeably longer, which is why hazard rooms punish a shredded outfit.
Where the "character collection" actually lives
There is no roster screen, but three systems track characters:
- Gallery. Unlocking every scene completes Hold That Pose. It fills from story progress and the post-game room.
- Post-game spawning. Part of the Family asks for one of every creature type; Overpopulation asks for 100 spawns. Both need the Sandbox Room.
- Hypnosis Mask scene. A scripted story event that unlocks Can't Feel My Face.
If you are chasing completion, the 100% checklist→ sequences all three so you are not re-clearing sectors for a single flag.
What the developer has not documented
Being explicit here saves you from invented numbers elsewhere:
- Enemy health and damage values: Not documented. No bestiary, no stat overlay.
- Official enemy names: Not documented. The 35+ count is official; the individual labels are working names.
- A second playable character or alternate costume rig: Not documented. All customisation is layered on the same survivor.
- Enemy scaling by difficulty: Not documented. Hard mode is documented as tighter windows, not new stat blocks.
Common mistakes
| Mistake | Why it costs a run | Fix |
|---|---|---|
| Treating the survivor as a build | There are no stats to build | Spend pickups on capacity, guns and presets |
| Shooting flyers instead of nests | Spawn never ends, ammo drains | Kill the nest first |
| Fighting web rooms at stage 3 | Silk plus grab is a long animation | Load a clean preset at the save room |
| Saving the sniper for trash | Boss heads need that reserve | Pistol and SMG for anything small |
| Expecting a codex | No in-game bestiary exists | Use the family table above |
FAQ
How many characters are in CelSector? One playable survivor, 35+ enemy types and four boss encounters. There is no party system and no named companion roster.
Can you play as a different character? No alternate survivor is documented. You change the look through 16 clothing layers, not the character.
Who are the bosses in CelSector? In order of the route: the optional giant worm, the queen wasp in B2, the jellyfish boss in C1 and the two-head final boss in C2.
Do enemies have official names? The developer publishes a total count, not a list. The names used here come from the routes and match the enemy behaviour you see.
Is there a bestiary or gallery for enemies? No bestiary. The Gallery tracks scenes and the Sandbox Room lets you spawn creatures after the credits.
Sources
Official source: CelSector on Steam ↗ · CelSector demo on itch.io ↗ · Steam news and patch notes ↗
Tested source: route observations across the six sector walkthroughs on this site (A1-C2), including the boss order and the enemy families that appear in each sector.